
Cross Roller Ball Rail Assembly Instruction
Assembly Instructions
1
Apply oil in low viscosity on contact planes, fix rail 1 - 3 with regular torque.
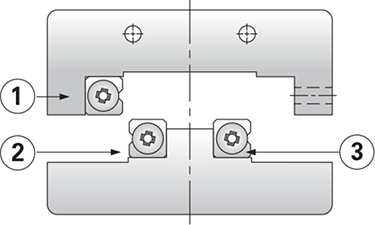
2
Temporarily lock rail in adjusted side 4.
3
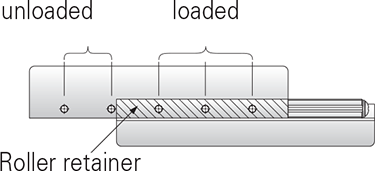
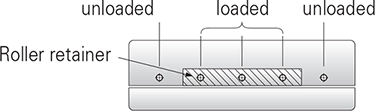
Disassemble end screw from end of one side, and carefully insert roller retainer to nearby center of the rail.
- Lock the end screw.
- Slowly move table back and forth to the rail end and adjust roller retainer position to rail center.
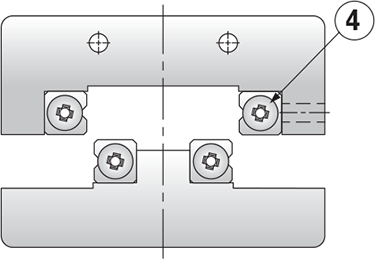
4
Fix gauges both in center and side of the table (level plane).

5
Move table to end of one side, and lock pre-load adjusting screw slightly.
6
Move table to the end of the other side, as above description, and lock pre-load adjusting screw slightly.
7
Return table to center and lock pre-loads adjusting screw slightly, ensuring that all clearance has been removed.
8
Finally securely lock the rail 4. As steps of screw adjustment, move table bach and forth , then have the table over roller retainer, and lock screws in order.
Application Examples
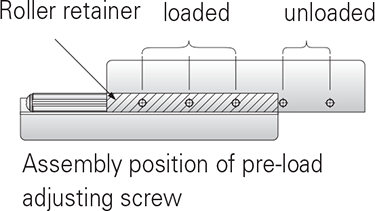
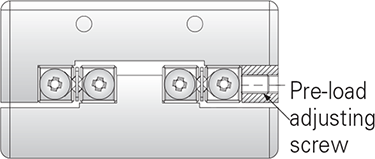
Pre-load adjusting screw-set screw is used to do normal adjustment.
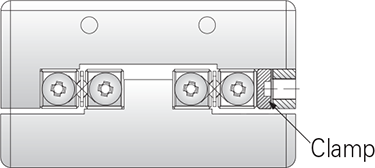
Use clamp to achieve requirement of accuracy and rigidity.
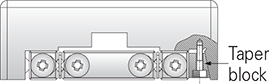
Use taper block to meet special requirement of high rigidity and high accuracy.
Installation Notes
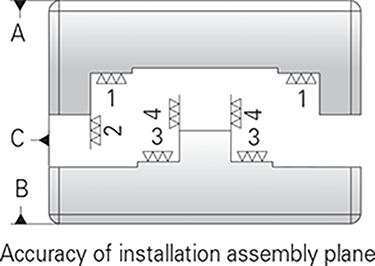
In order for Nook linear motion cross roller rails to function, it is recommended to install assembly planes with accuracy same as parallelism precisely processed in linear motion cross roller rail.
All burrs, dent, dust, miscellaneous objects on the rail of table and base need to be cleaned spotlessly and keep eyes on assembly operation application.
Preload adjustment, too much preload would cause press damage to reduce life; it's normally recommended to use zero or tiny preload.